Alien Mods SRP Lite load cell kit Install Guide
So you received your Alien Mods SRP Lite load cell kit Install Guide!
That’s great news and we’d sure like to see where you chose to place this shiny sticker! Post on social media and don’t forget to tag Alien Mods.
You can find the product on our site at – https://alien-mods.com/shop/product/srp-lite-load-cell-kit-moza/
This procedure will take at most 20 minutes, and use only one tool. For the “dirty-hack” version maybe as low as 20 seconds.
You can also find an extended version of the Alien Mods SRP Lite load cell kit Install Guide with a video by Michael Smith who reviewed our product on his Youtube channel – https://www.youtube.com/watch?v=Tei0i1iZGp8
There is a fingertool included to help undo them.
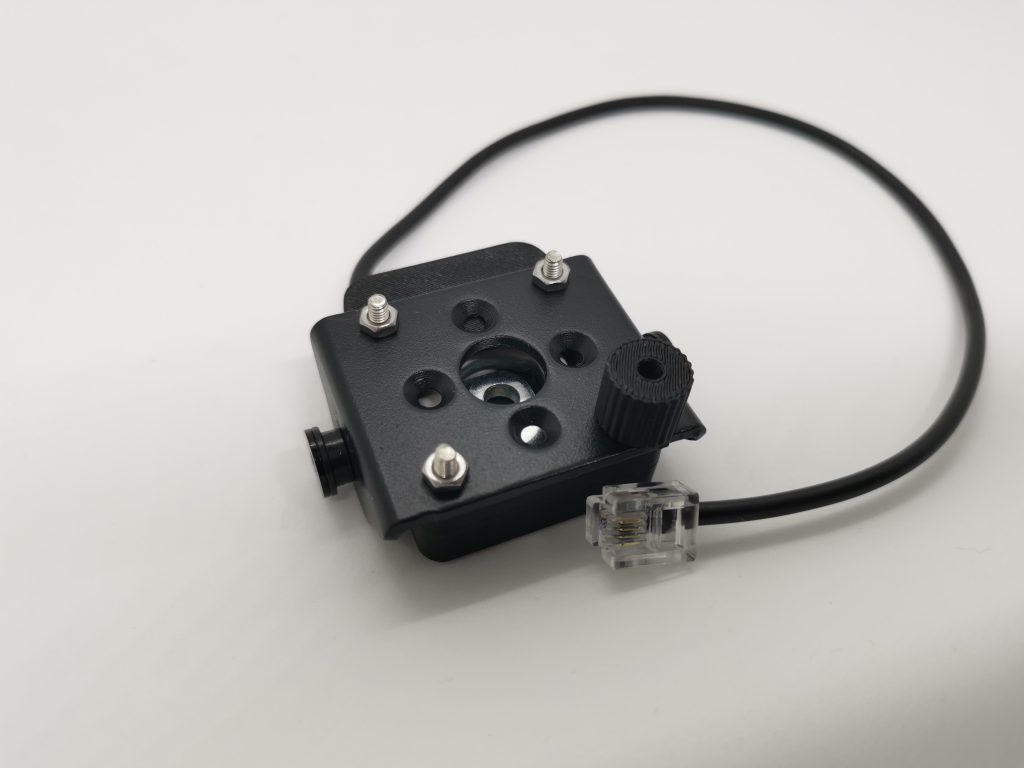
Mechanical assembly

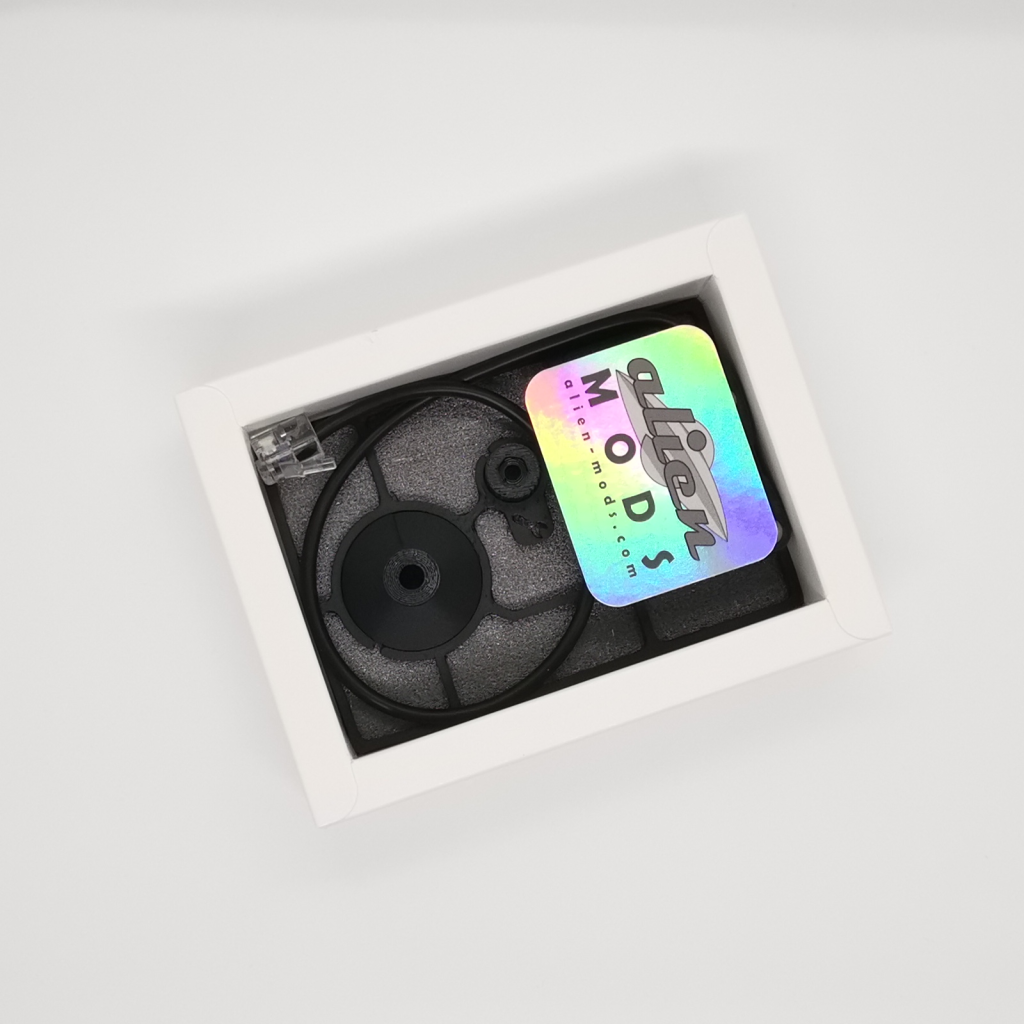
– the unit itself
– the cup: it accepts the Performance Kit elastomer (or the Alien Mods alternative Pedal Travel Tune Kit) and directs the pressure on to the cell
– the small finger-tool and 4 M3 A2 stainless steel nuts
– a cool Alien Mods sticker -> please place it on your cool gear, share and tag us on social media!

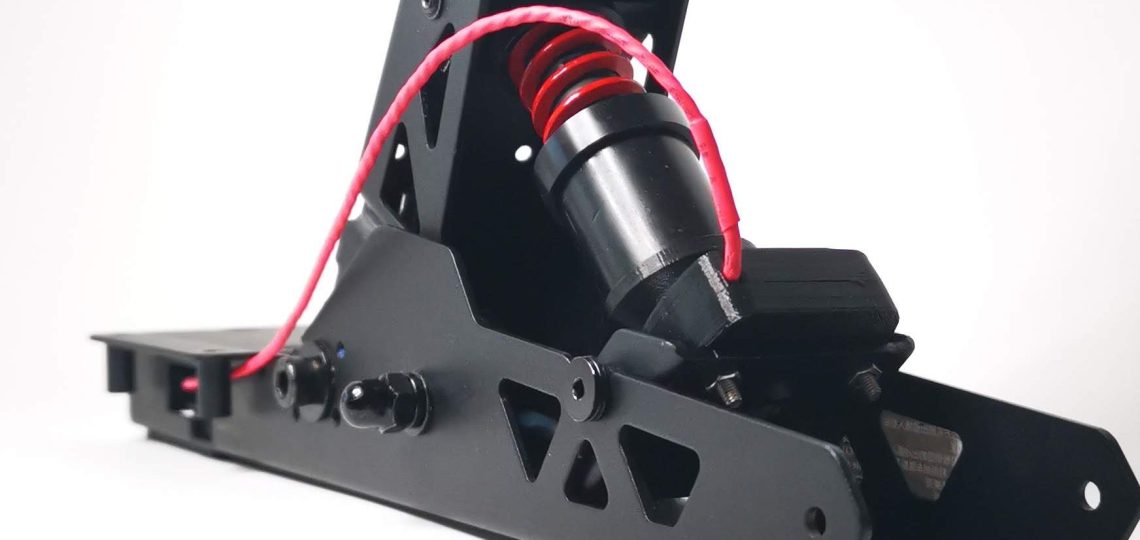
To begin, you’ll need to take apart the bottom ensemble of the performance kit. Your performance kit came with two identical hex keys. Use one of them or another HEX 2 (Allen) key you may have in your toolbox.

If you have the threaded ‘bosses’ on the bottom plate, on the unit, there are two matching shapes. Place the unit with regard to the two bosses and use the hex key to tighten the two free spinning bolts.
If your unit does not have the threads, simply drop the unit through the holes.
Use the provided tool to tighten the four nuts. Finger-tight should do.
Electronics
The connector for the brake is inside a protective case in the brake pedal, not exposed as in the case of the throttle or clutch. Again, you’ll need the same key you used earlier or the one from the Moza kit.

Under the metallic cover, there’s a PCB. It it’s a simple circuit that consolidates the 3 RJ11 connectors for each of the 3 pedals into one single RJ45. Take care it’s the shabbiest piece of kit Moza manufactures. Please check now if yours is properly soldered, if not I’d advise you to touch it up if you have soldering skills and equipment or take it to a shop (it’s an easy job and might spare you some headaches).


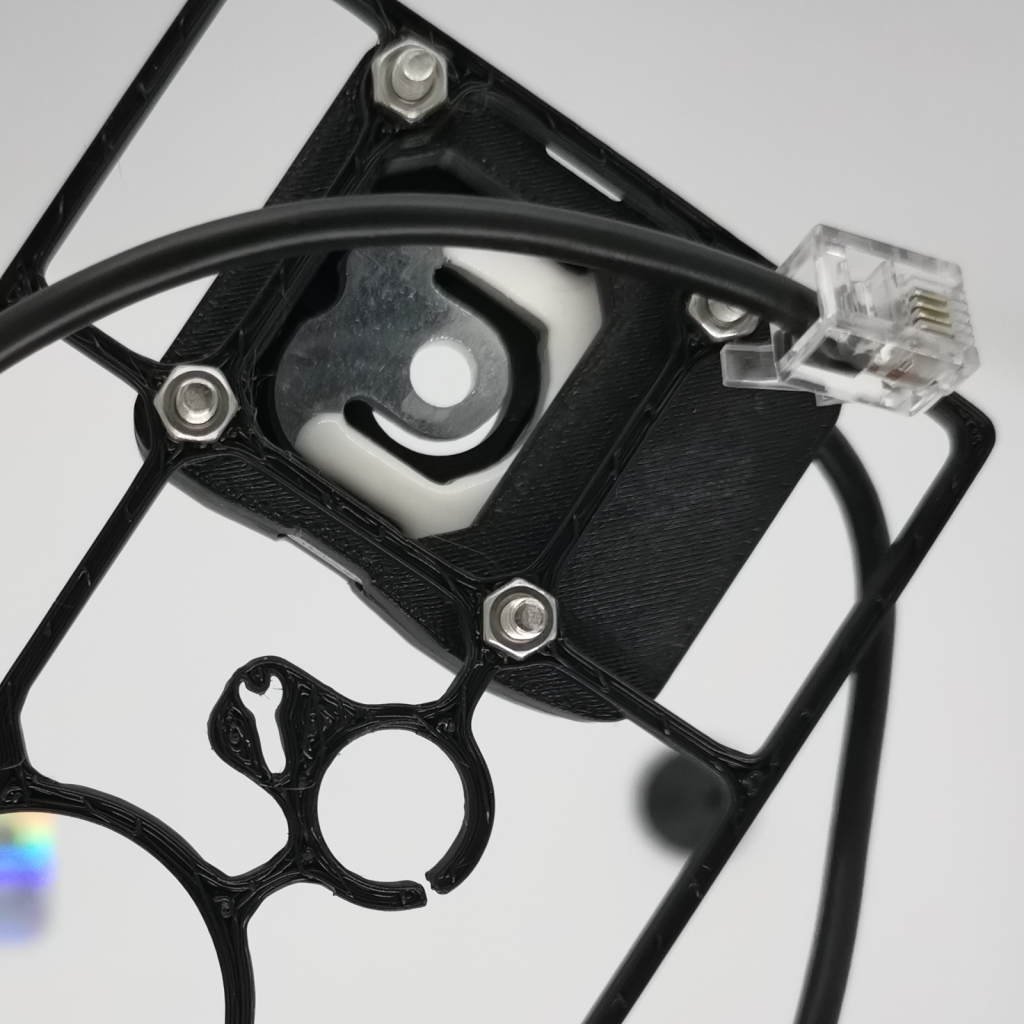
Unplug the hall effect sensor and plug the Alien Mods SRP Lite Loadcell kit, taking care to thread the connector through the side opening. You can bend the cable at 90 degrees to come out in front of the throttle connector.

Next, find a good position for the unplugged hall-effect sensor connector allowing you to close back the cover, route the cable as you want and mount the Alien Mods SRP Lite Loadcell kit onto the Performance kit, using the other printed spacer between the elastomer and the cell.

Please make sure route the cable so that it does not snag, catch or crimp when using the brake.
Congratulations, that’s it!
Snap the Performance Kit with the loadcell back onto the pedal and please mind that there’s a correct orientation!
Mount back in your rig, plug the cables for the other pedal(s) and the RJ45 into the base.
- DIRTY HACK: IF you don’t use a clutch, just plug the Alien Mods SRP Lite Loadcell kit into the clutch connector and remap the clutch as brake in your sims.
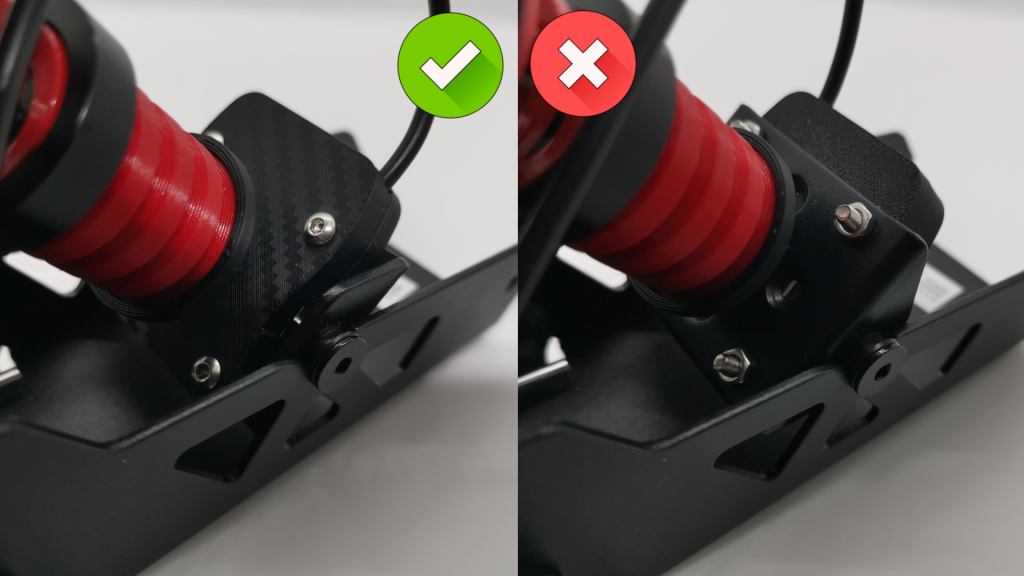
Please make sure the unit is installed with the correct orientation as shown here. Incorrect mounting will not damage the unit but leads to the signal cutting off prematurely.
CALIBRATION
The install is done, next let’s calibrate your new input device.
Open Pit House and go to the pedals tab, please note – the calibration button is not visible – you must scroll down to see it.
Push calibrate, CLOSE YOUR EYES and press as much as you want 100% to be. But DON’T look at the graph, do it by instinct because that’s how your brain works.
Do NOT use solely the set min and set max buttons – these buttons are for setting deadzones not for calibrating the sensor’s output so failing to properly map the sensor output to 0-100% ingame will rob you of the precision and resolution this mod provides!

That’s it. If you’ve calibrated correctly, it will feel like home quite quickly!
Thank you and enjoy seeing that delta melting!
